
The final step in creating a secure and consistent connection between JumpCloud and Google Workspace is syncing data between the two platforms. This article outlines the steps you need to take to import or export data between JumpCloud and Google Workspace.
Prerequisites
- A JumpCloud administrator account
- JumpCloud Device Package or higher
- A Google Workspace Cloud Directory integration authorized and active in JumpCloud
- You have read through the considerations for Get Started: Google Workspace Integration
- You have reviewed the attribute considerations and configured your desired user attributes per Configure the Google Workspace Integration
- An alternative method has been setup for 2-Step Verification, like a phone number
Considerations
- Inactive users in Google will not be created in JumpCloud
Importing Google Workspace Users
Importing users allows you to:
- Conveniently create pre-existing Google accounts in JumpCloud, either manually or automatically
- Continuously sync changes from Google Workspace to JumpCloud when user identities are being managed in Google
- Import one-off changes made in Google Workspace directly when user identities are being managed in JumpCloud
![]()
When selecting a manual import, the process will start immediately. If automatic imports are enabled, the initial import will start within the next hour and then run hourly afterwards.
To manually import users
- Log in to the JumpCloud Admin Portal.
- Navigate to DIRECTORY INTEGRATIONS > Cloud Directories.
- Select the integration you authorized when completing the steps in Get Started: Google Workspace Integration.
- Navigate to the Details tab and scroll down to the Attribute mapping and settings section.
- Confirm your attribute mapping and settings (per Configure the Google Workspace Integration) to ensure you are importing and exporting the proper attributes.
![]()
When users are imported from Google Workspace, JumpCloud populates the Username field with the username portion of the imported user's email address as it's configured in Google Workspace. For example, jo.lei@demoexample.com would have a username of jo.lei in JumpCloud. Users are created with only the attributes you want JumpCloud to control, which are those with import selected in the JumpCloud to import or export? column.
- Scroll back up to the Import Users section.
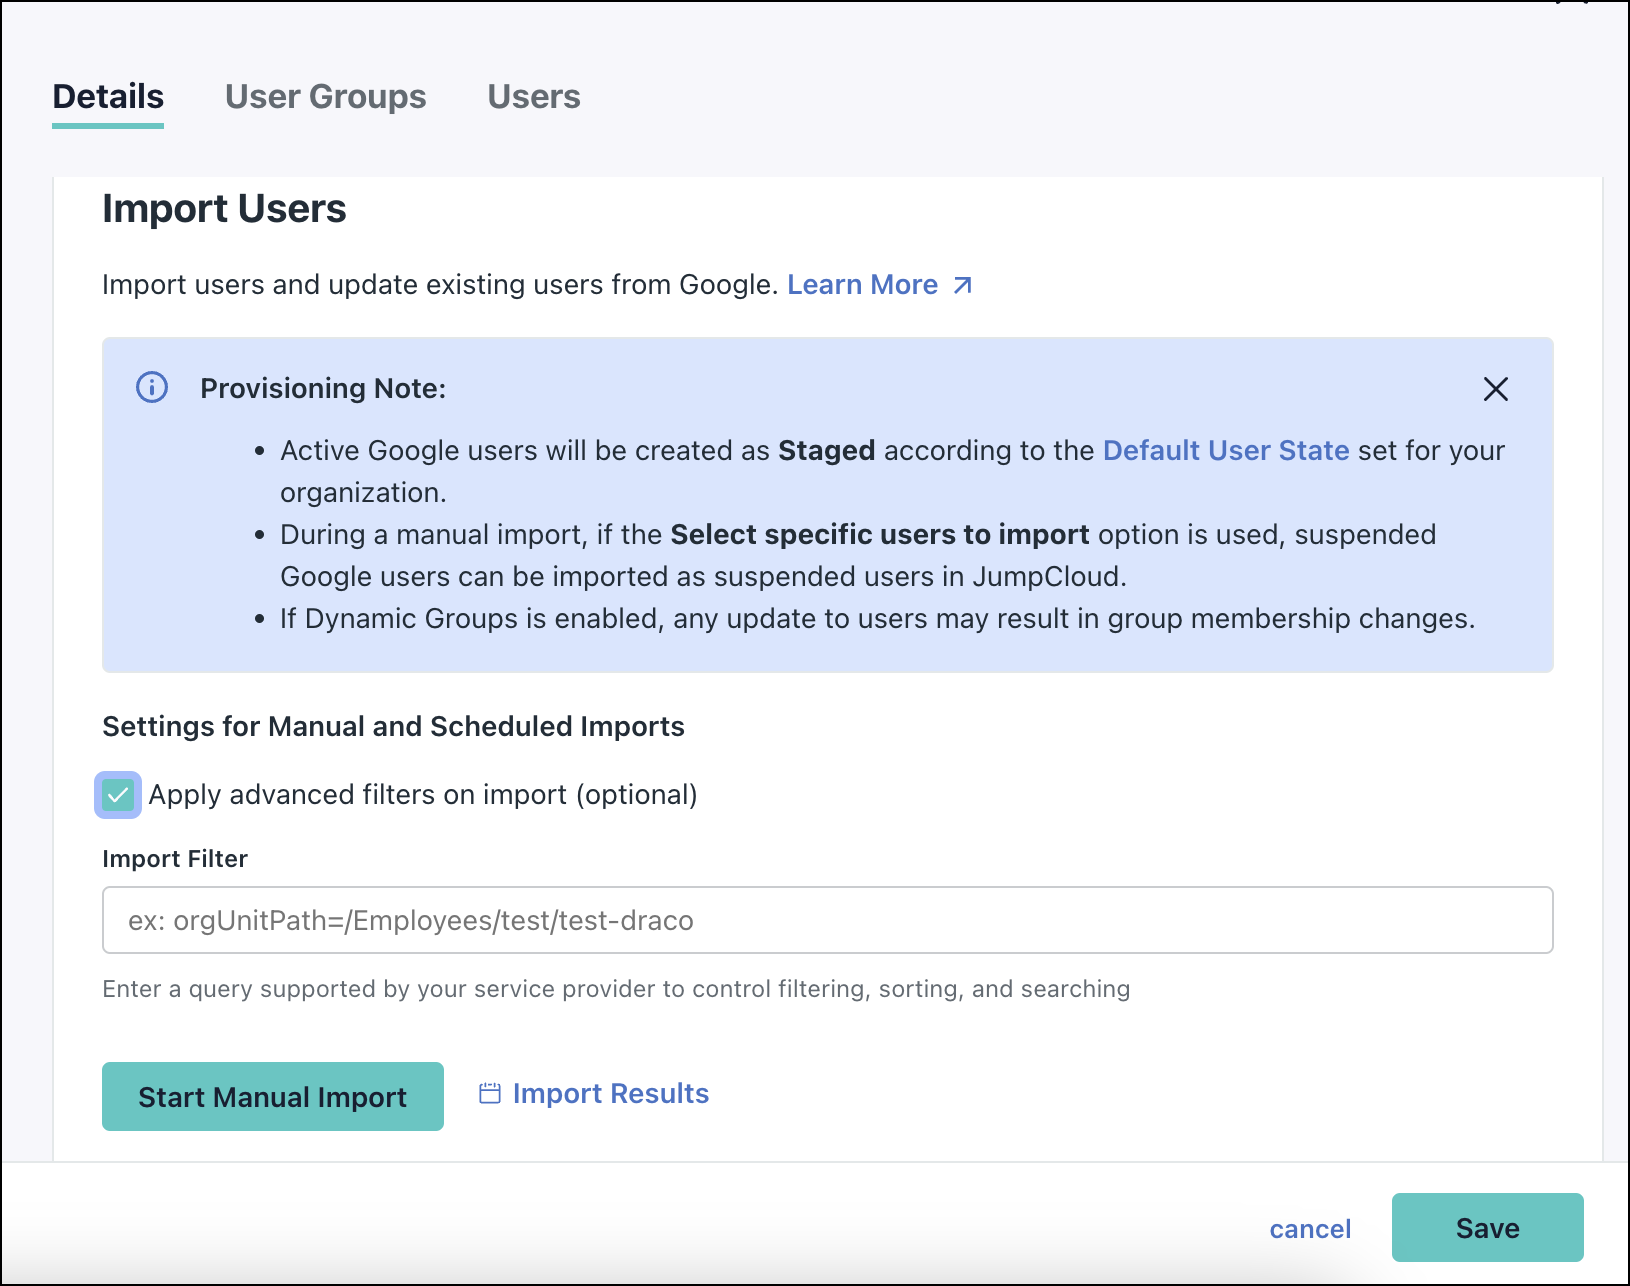
- If you want to apply advanced filters, select the Apply advanced filters on import checkbox. See Applying an Advanced Filter to learn more.
- Click Start Manual Import.
- Select one of the following:
- New users and user updates
- New users only
- User updates only
- Select specific new users to import.
- Click Import.
- You will receive an email with a link to the import results. If you imported fewer than 100 users, you will also see the results in the last step of the import flow.
![]()
Users who were successfully imported have a green check mark. Users who weren’t imported have a red exclamation mark, and the Import message explains why a user wasn’t imported. When you close the import modal, you’re returned to the Google Workspace Directory Details panel.
You can see the state of new accounts in the Admin Portal Users list. The default user state for imported users will be either active or staged, depending on the Default User State for user Creation value set. See Manage User States for more information.
Imported users must have an active user state and a password set by either you or them before they will have access to their assigned resources. They will continue to have access to Google using their Google password until the activation process is complete for their JumpCloud account, and they are given access to Google Workspace from JumpCloud.
![]()
You can also import users from the JumpCloud Admin Portal from User Management > Users by clicking ( + ), then selecting Google Workspace.
To enable automatic imports and updates
After doing your initial manual import, you can enable automatic (hourly) updates from Google.
- Log in to the JumpCloud Admin Portal.
- Navigate to DIRECTORY INTEGRATIONS > Cloud Directories.
- Select the integration you authorized.
- Navigate to Details > Import Users and toggle on Enable automatic imports of users and user updates from Google to enable it.

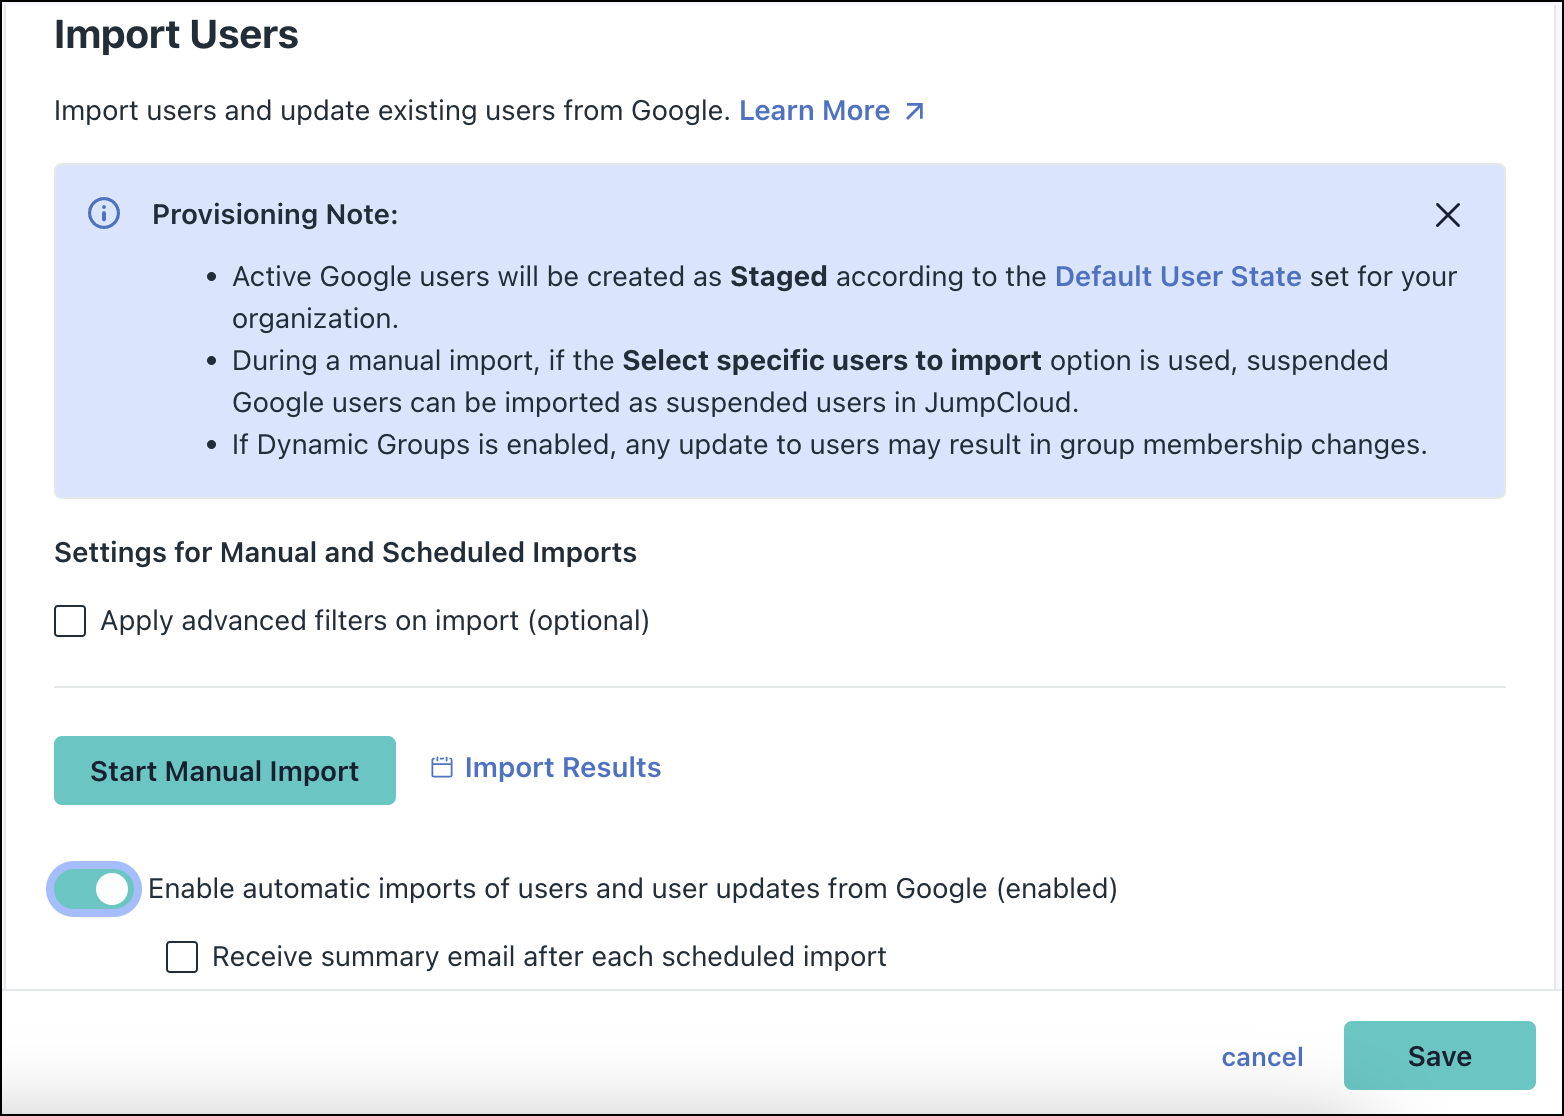
- Optionally, select Receive summary email after each scheduled import to receive an email after each import is complete.
- Click Save.
Applying an Advanced Filter
Admins can import a subset of users. This allows the Admin to control the users that are imported during manual and scheduled imports. To apply an advanced filter:
- Go to DIRECTORY INTEGRATIONS > Cloud Directories.
- Click the desired directory or proceed to create a new directory by clicking the (+) button. See Get Started: Google Workspace Integration to learn more.

- In the Details tab, select the Apply advanced filters on import checkbox under Import Users.
- In the Import Filter textbox, enter the desired query parameters. You can enter multiple parameters separated by the (&) sign. Here are some examples of advanced filters. See Standard Query Parameters to learn more.
- Click Start Manual Import to perform a manual import using the filter or click Save to save the filter.
If you don’t want to save the filter, uncheck Apply advanced filters on import checkbox to remove the filter completely or don’t click Save so that the previously saved filter is retained.
Only saved filters are used for automatic imports. Automatic imports are performed when you toggle on “Enable automatic imports of users and user updates from Google” to enable it.
A filter shown in the Import Filter textbox is used when performing a manual import. The filter doesn’t have to be saved. This allows you to apply a temporary filter for a single manual import. If you don’t want to keep the filter for future use, close or cancel the configuration. You will be notified that there are unsaved changes. Confirm if you wish to continue. When you open the configuration again, the previously saved filter (if one exists) appears.
Associating JumpCloud users with Google Workspace
After you authorize syncing for your Google Workspace directory, you can specify users and groups to manage from JumpCloud by associating them to that Google Workspace directory. Users can be given access to a Google Workspace directory either directly or through a user group.
Prerequisites
- An authorized and activated Google Workspace directory.
- Ensure that any users or groups, either preexisting or new, follow Google's naming guidelines.
Considerations
- When you remove a user from a Google Workspace directory in JumpCloud, either directly or by removing them from all User Groups that disconnects them from the Google Workspace directory, the user is immediately suspended in Google Workspace and any existing Google sessions expire. After they’re disconnected, the user is unable to log in to any Google Workspace resources that are connected to that directory.
- Don’t add a Google Workspace directory more than once in JumpCloud. If you authorize sync for the same Google Workspace directory more than once, users that are connected to multiple instances of the same Google Workspace directory in JumpCloud could be suspended if you remove them from one of the instances. You can avoid this by deactivating the sync for duplicate Google Workspace directories.
To connect JumpCloud users to a Google Workspace directory
From User Management > Users
- Log in to the JumpCloud Admin Portal.
- Navigate to USER MANAGEMENT > Users.
- Select a user to view their details.
- Select the Directories tab.
- Select the Google Workspace directory to which you want to connect the user.
- Click Save User. Synchronization will be initiated.


From User Management > User Groups
- Log in to the JumpCloud Admin Portal.
- Navigate to USER MANAGEMENT > User Groups.
- Select a user group to view their details.
- Select the Directories tab
- Select the Google Workspace directory to which you want users in the user group to be synced and have access.
- Select the Users tab.
- Check the box next to each user you want added to the group.
- Click Save Group. Synchronization is initiated.


![]()
You can also connect a user or user group from the Google Workspace Cloud Directory configuration page. Navigate to Cloud Directories, select the Google Workspace Directory, select the Users or User Groups tab, then select the user(s) or user group(s) you want to give access to the Workspace directory and click save.
Post connection behavior
After you connect a user to a Google Workspace directory
- If the user didn’t previously exist in Google Workspace and the email sent as the PrimaryEmail matches a Google Workspace directory domain, a new, active user account is provisioned to Google Workspace
![]()
The Domains configuration for the integration will determine what happens If the user’s company email domain does not match the Google Workspace directory domain or the list of configured domains. See Configuring Domain(s).
- If the user resets their JumpCloud password, it's synced to Google Workspace. When set, existing sessions to Google Workspace apps expire, and the user must log in again.
- After you connect a user to a Google Workspace directory, the flow differs slightly for staged and active users:
- Staged user flow: A staged user is a user in a ‘staged' user state with a password status of either ‘password pending' or 'active’.
- Staged users who do not already exist in the Google Workspace directory will not have access to Google Workspace until you change their user state to active and a password is set in JumpCloud. They will not receive welcome or activation emails until they are in an 'active’ user state.
- Staged users who already exist in the Google Workspace directory will remain active in that directory and will continue to have access. See Manage User States for more information about user states.
- Active user flow: An active user is a user in an 'active' user state, has a password, and that password status is set to 'active'. After you add an active user to your Google Workspace directory in JumpCloud, the user receives an email that tells them which directory they’ve been added to and to synchronize their password by logging in to their User Portal.
- Staged user flow: A staged user is a user in a ‘staged' user state with a password status of either ‘password pending' or 'active’.
After you connect a group to a Google Workspace Directory
- If you enabled Google Workspace group management and no distribution group with a matching email exists in Google Workspace, a distribution group is created in Google Workspace, and the JumpCloud group name and description are synced to the new Google Workspace distribution group.
- If you changed a user group’s membership in JumpCloud, the changes are synced to Google.