What is JIT?
Just-in-Time (JIT) provisioning lets you onboard new users to Single Sign On (SSO) applications more efficiently. When JIT provisioning is in use, you don’t have to manually create new user accounts in an application. Instead, a user account is created when a user authenticates into an application for the first time using SSO. JumpCloud supports the use of JIT provisioning by including the user attributes a service provider (SP) requires for account creation.
The Benefits
JIT provisioning lets you automate user provisioning to SSO applications, giving you more time to focus on higher value projects. End users also benefit by gaining faster access to the SSO applications they need to do their jobs.
How JIT Provisioning Works
The typical JIT provisional workflow looks like this:
- Enable JIT provisioning in the SP.
- Configure the appropriate SAML SSO connector in the identity provider and SP, making sure to set up the JIT required user attributes.
- Authorize a user’s access to the application in the identity provider.
To complete the provisioning process, a user logs in to the application using SSO. The SAML assertion passes from the identity provider to the SP, and gives the SP the information it needs to create the user account.
JIT Provisioning and JumpCloud
JIT provisioning is possible in JumpCloud using the SAML 2.0 Connector and some of our pre-built connectors. To successfully use JIT provisioning, you need to understand what the SP requires and how to meet those requirements in the connectors.
JIT Provisioning SP Notes
- Not all SPs support JIT provisioning.
- Determine if JIT provisioning is inherently enabled in the SP or if you need to manually enable it.
- Understand what attributes are required from the SP. You can find this information in the SP’s documentation or by reaching out to the SP’s customer success team.
- SPs can differ in their behavior, especially when it comes to existing user accounts. Make sure you understand all of the steps you need to take on the SP side for SSO and JIT provisioning.
JIT Provisioning with the SAML 2.0 Connector
SAML 2.0 Connector Notes
- In the user attributes section:
- What you enter in the Service Provider Attribute Name field needs to map to what the SP requires for that user attribute.
- What you enter in the JumpCloud Attribute Name field needs to match the JumpCloud system user property name (such as email, firstname, lastname).
- Some SPs require user attributes that JumpCloud doesn’t have yet. In this case, you can create a custom attribute to satisfy the requirement, or you can use an existing field that roughly maps to the attribute the SP is looking for. For example, you could use JumpCloud’s Employee ID field in place of a profileID attribute.
To create a SAML 2.0 Connector
- Log in to the JumpCloud Administrator Portal.
- Go to USER AUTHENTICATION > SSO Applications.
- Click + Add New Application.
- Type the name of the application in the Search field and select it.
JIT Provisioning with Pre-built Connectors
![]()
Some pre-built connectors require additional attributes for JIT provisioning. In these connectors, JIT required attributes are pre-populated and are on by default to enable JIT provisioning. You can’t edit the JIT required SP attributes. You can customize the JumpCloud attribute name and the constant value for JIT required attributes. Toggle off the attributes if you’d like to opt out of sending the attributes in the SAML assertion. Learn more about configuring user attributes for SAML connectors.
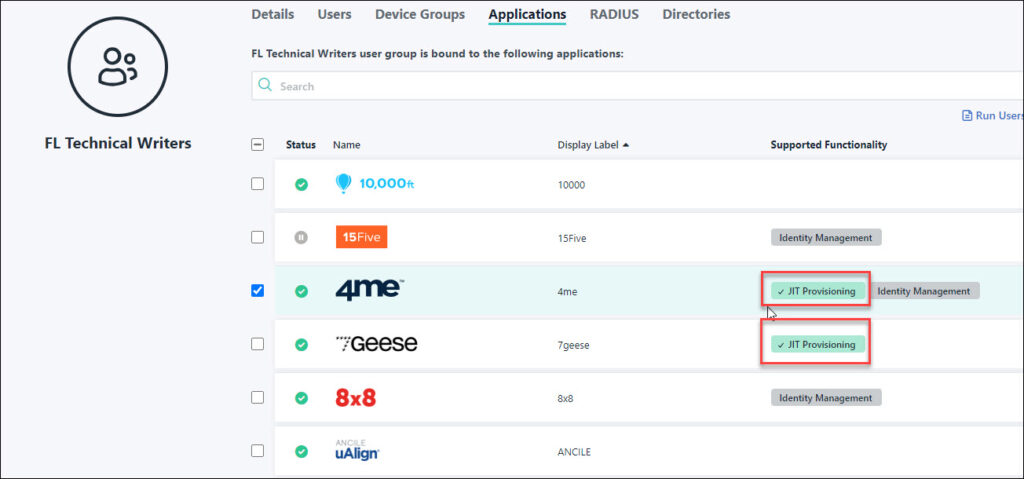
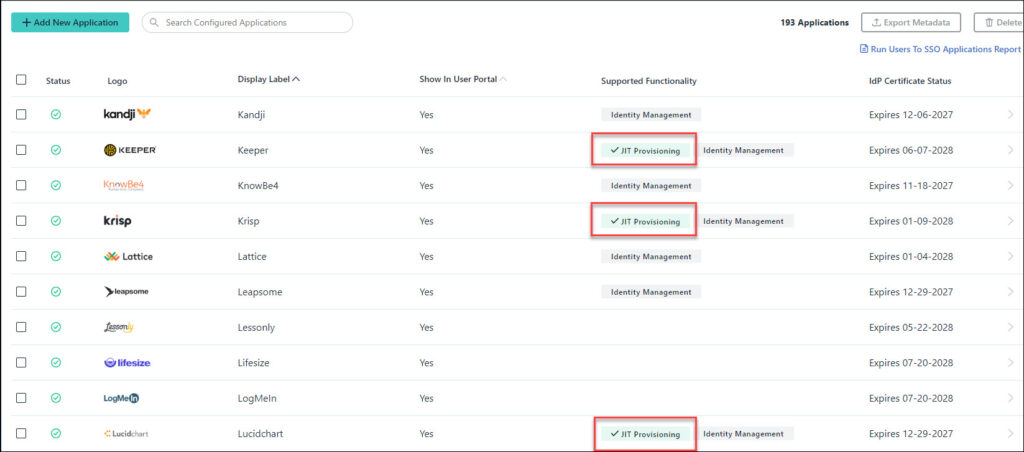
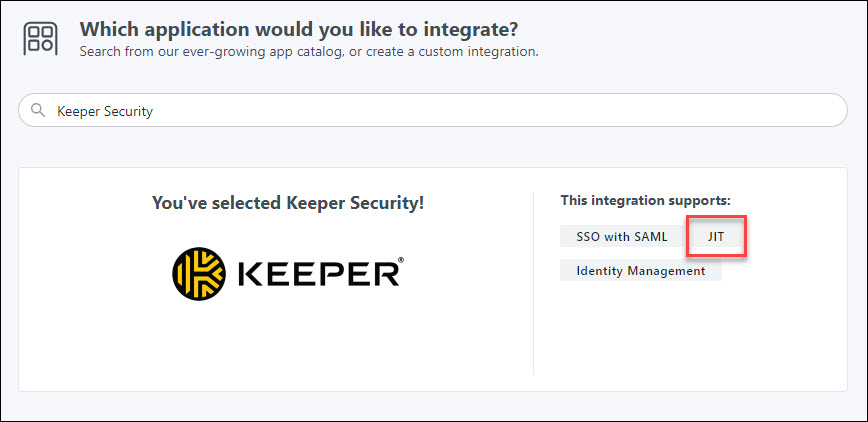
To identify a JIT supported pre-built connector, check against this table or look for a JIT Provisioning label in the following places:
- The Supported Functionality column in the Configured Applications list.
- The Create New Application Integration workflow.
- The User Group Application details panel list view.