When you run a Windows command in JumpCloud, the command runs as a privileged user. You can use our Windows - Run As Signed In User Template command to “impersonate” the user on a Windows device to add a printer.
Considerations:
- Make sure that the users you intend to use the printer are bound to the print server in JumpCloud. See Bind Users to Devices.
- When you use this template, you will not get a command output. Instead, you get a PID (process identifier) of the process that ran.
To add a printer:
- Log in to the JumpCloud Admin Portal: https://console.jumpcloud.com/login.
- Go to DEVICE MANAGEMENT > Commands.
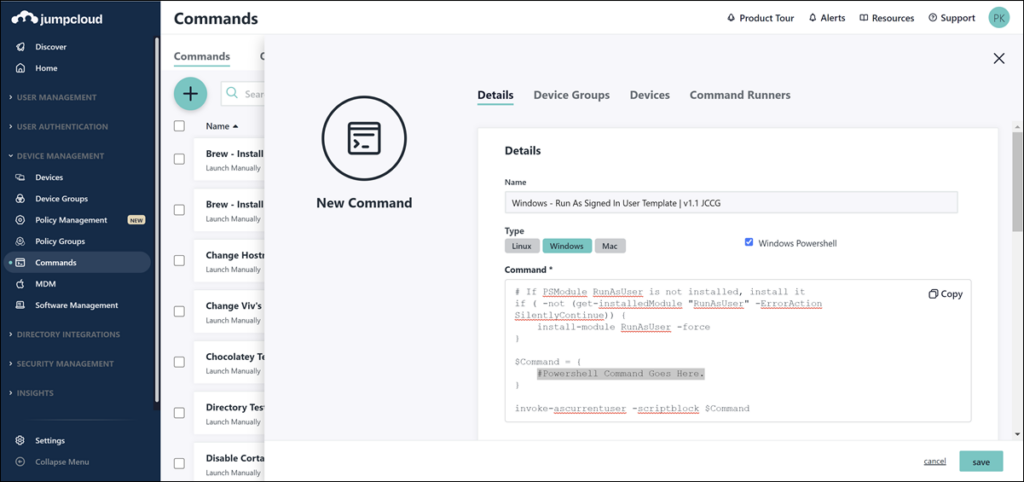
- Click ( + ), then choose Command from Template.
- Search for the Windows – Run As Signed In User Template.

- Click configure.
- In the Command section, replace the #Powershell Command Goes Here. text with the following, updated to reflect your printer information:
Add-Printer -ConnectionName \\printServer\printerName
For example, if your print server IP address is 192.168.1.23 and your printer's name is Lexmark, the command would be:
Add-Printer -ConnectionName \\192.168.1.23\Lexmark

- (Optional) Update the Name of the command to something more recognizable to you.
- Click save.
- Proceed to run the command on the print server to add the printer to the server.
Back to Top